Our Location
304 North Cardinal St.
Dorchester Center, MA 02124

304 North Cardinal St.
Dorchester Center, MA 02124

The Order System is installed by default, but may need to be installed for addon companies.
The Order System is responsible for all order forms and order handling in Blesta. As of version 4.11, the Order System also includes an Affiliate System, which is tightly integrated with orders.
| Widgets | Nav Links | Client Cards | Automation Tasks | Email Templates | ACL Permissions | Search | Events | Service Management | Messengers |
|---|---|---|---|---|---|---|---|---|---|
| YES | YES | YES | YES | YES | YES | YES | NONE | NONE | YES |
* Plugins are powerful and are not limited to the tie-ins listed above, these are just some of the most common

Once installed, a new link will appear under [Packages] > Order Forms, where order forms can be managed. In the screen below, two order forms have already been created and they can be managed at this location.

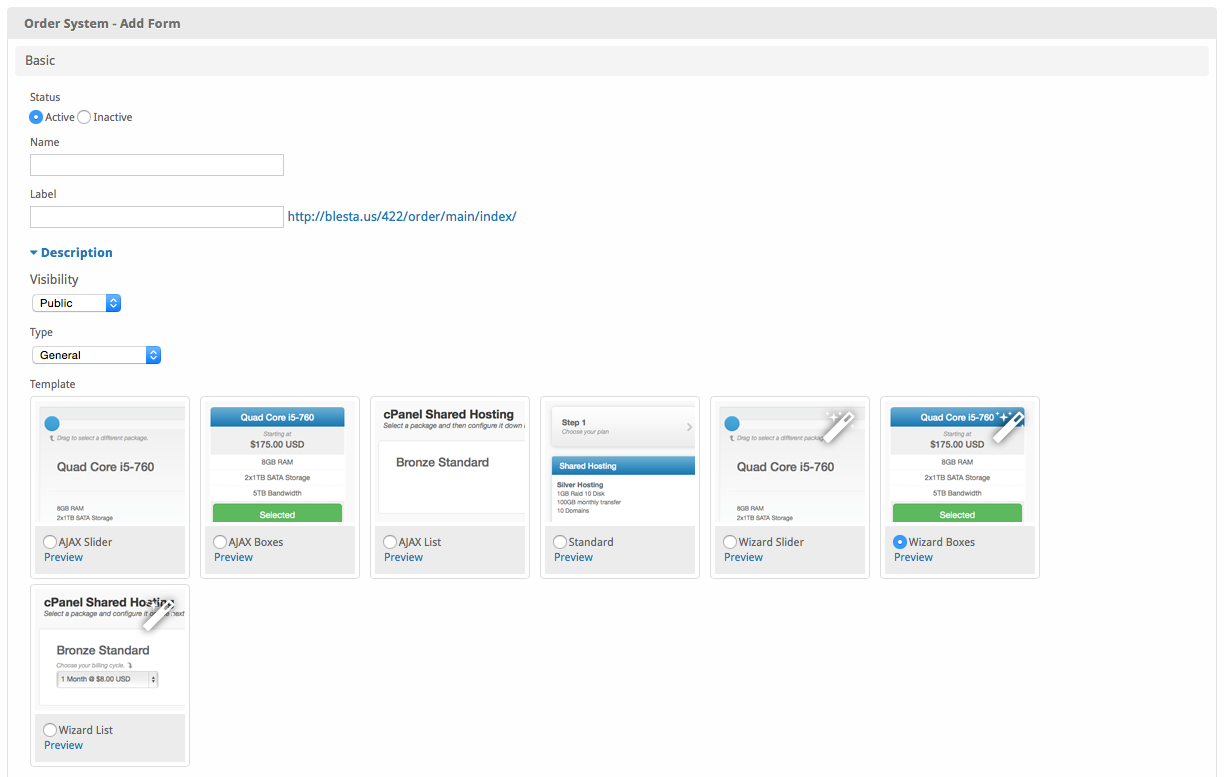
To create an order form, click the “Add Order Form” button in the upper right of the overview and fill out the options. Click “Add Form” to create the order form.
This section requests some basic information regarding the order form and it’s configuration including:
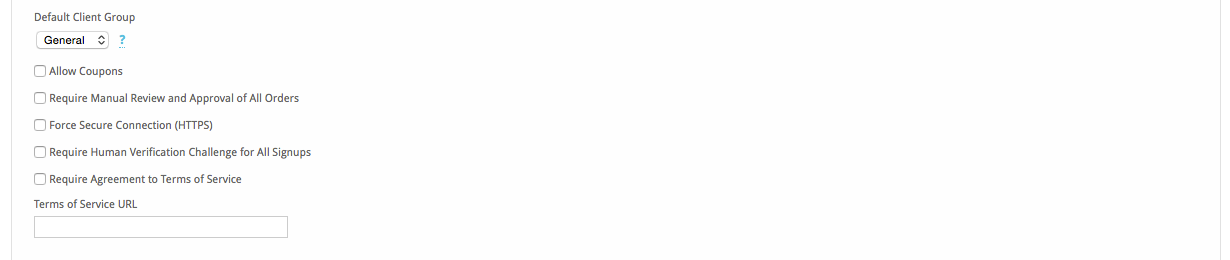
This section contains some additional options within the Basic section.
These sections determine what Package Groups (And hence Packages) are available through this order form as well as what currencies are accepted.


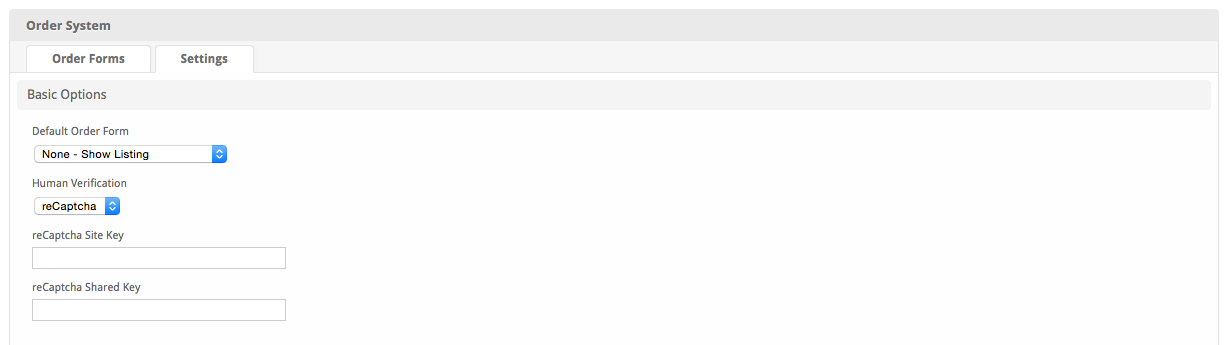
The Order System supports various settings for human verification, fraud detection, embed codes, marketing emails, and allows the default order form to be selected. The default order form appears at ~/order/ and is linked to from the Portal page. Settings consist of several sections.
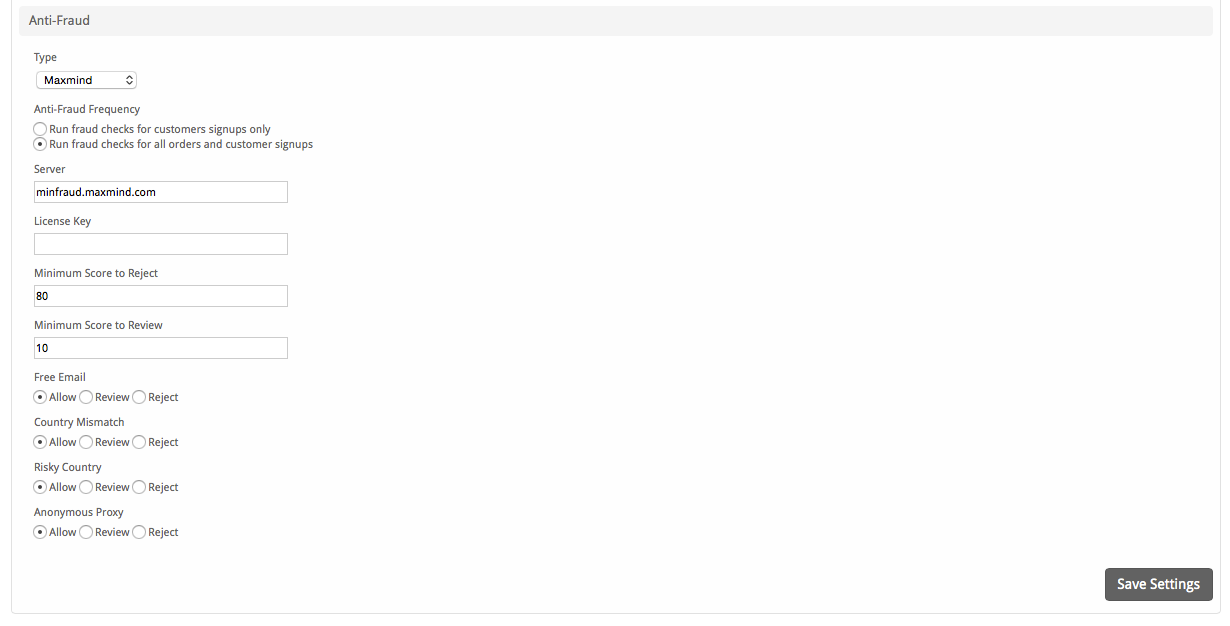
Type – The type of anti-fraud to use. The current options are None, Maxmind, and FraudLabsPro. None disables anti-fraud checks, Maxmind enables them through Maxmind, and FraudLabsPro enabled them through FraudLabsPro. An account with Maxmind is required to use Maxmind anti-fraud. An account with FraudLabsPro is required to use FraudLabsPro anti-fraud. The following options assume that Maxmind has been selected.
The following settings assume Maxmind was selected:
The following settings assume FraudLabsPro was selected:
The embed code field allows any HTML or JavaScript to be directly injected, as written, into the footer of pages on the order form. Tag replacement is supported (see Customizing Emails), including a tag for the order_page so that you may set content only on specific pages.
The “order_page” tag contains the controller and action that references a specific page, which may include any one of the following:
| {{order_page}} value | Notes |
|---|---|
| signup/index | The new account registration page |
| main/index | The package selection page |
| main/packages | A specific package selection page |
| forms/index | The order form listing page |
| config/index | A specific package configuration page |
| config/preconfig | A specific package pre-configuration page |
| checkout/index | The payment page |
| checkout/complete | The completed order page |
| cart/index | The cart page |
For example, the following embed code will display a message at the bottom of the registration page. You can use the {% debug %} tag to display all data available to aid in determining which variables you want to use, but this tag should not be used in production. Note that the data available will change depending on what stage in the order process you are.
{% if order_page == "signup/index" %}<h1>We are on the signup page</h1>{% endif %} |
While the Order plugin does not send marketing emails, prospective clients may need to opt-in or opt-out of receiving marketing emails that you or the system may later send.
Order related email templates can be found under [Settings] > [Company] > [Emails] > Email Templates, in the section labeled “Plugin Templates”.
The order received email templates allow for the following tags:
| Tags | Description | Notes |
|---|---|---|
| {order.id} | The system-level order ID | |
| {order.number} | The order number | e.g. “519131eb623b8” |
| {order.client_id} | The system-level client ID of the client this order belongs to | |
| {order.client_id_code} | The friendly client ID code | |
| {order.client_first_name} | The first name of the client | |
| {order.client_last_name} | The last name of the client | |
| {order.client_company} | The client’s company name | |
| {order.client_address1} | The client’s primary address | |
| {order.client_email} | The client’s email address | |
| {invoice.id} | The system-level invoice ID of the invoice created for this order | |
| {invoice.id_code} | The friendly invoice ID code | |
| {invoice.date_due} | The UTC datetime stamp of the invoice due date | Formatted as “YYYY-MM-DD HH:MM:SS” |
| {invoice.date_billed} | The UTC datetime stamp of the invoice bill date | Formatted as “YYYY-MM-DD HH:MM:SS” |
| {invoice.total} | The total amount due on the invoice | e.g. “8.00” |
| {invoice.paid} | The total amount paid | e.g. “0.00” |
| {invoice.due} | The remaining amount due | e.g. “8.00” |
| {invoice.currency} | The currency that the invoice is in | e.g. “USD” |
Additional Tags
The ticket received email template allows for the following tags:
| Tags | Description | Notes |
|---|---|---|
| {order.id} | The system-level order ID | |
| {order.number} | The order number | e.g. “519131eb623b8” |
| {order.client_id} | The system-level client ID of the client this order belongs to | |
| {order.client_id_code} | The friendly client ID code | |
| {order.client_first_name} | The first name of the client | |
| {order.client_last_name} | The last name of the client | |
| {order.client_company} | The client’s company name | |
| {order.client_address1} | The client’s primary address | |
| {order.client_email} | The client’s email address | |
| {invoice.id} | The system-level invoice ID of the invoice created for this order | |
| {invoice.id_code} | The friendly invoice ID code | |
| {invoice.date_due} | The UTC datetime stamp of the invoice due date | Formatted as “YYYY-MM-DD HH:MM:SS” |
| {invoice.date_billed} | The UTC datetime stamp of the invoice bill date | Formatted as “YYYY-MM-DD HH:MM:SS” |
| {invoice.total} | The total amount due on the invoice | e.g. “8.00” |
| {invoice.paid} | The total amount paid | e.g. “0.00” |
| {invoice.due} | The remaining amount due | e.g. “8.00” |
| {invoice.currency} | The currency that the invoice is in | e.g. “USD” |
Additional Tags
A link to each order page is displayed in the staff area, under [Packages] > [Order Forms]. It’s also possible to link directly to a specific package, pricing option, or step.
The default order form exists at /order/, relative to your installation path. Other order forms may be accessed through their unique label identifier. Below are a few examples:
| Name | Label | URI | Default Order Form |
|---|---|---|---|
| Web Design | design | /order/or/order/main/index/design | YES |
| VPS Servers | vps | /order/main/index/vps | NO |
| Domain Registration | domains | /order/main/index/domains | NO |
The following examples demonstrate how to link to a particular product or price point.
| Description | Parameters | URI |
|---|---|---|
| Display Package Group | group_id The ID of the package group to display. | /order/main/packages/label/?group_id=1 |
| Display Package Group with Package Selected | group_id The ID of the package group to display.package_id The ID of the package to select by default.Note that this is the ID of the package as seen in the URL when editing the package. | /order/main/packages/label/?group_id=1&package_id=2 |
| Display Package Configuration with Price Selected | group_id The ID of the package group to display.pricing_id The ID of the package pricing.The pricing_id is the ID of a particular price point as defined under the package.configoptions A list of option IDs and their values (since plugin v2.21.0+) | Order TemplateURIAJAX BoxesAJAX SliderAJAX List/order/main/packages/label/?group_id=1&pricing_id=5Configurable Options may be set in version 2.21.0+ of the Order pluginSpecific configurable options can be set by specifying each option in the URI using the option ID and the option value in the format “configoptions[OPTIONID]=VALUE”, e.g.:/order/config/index/label/?group_id=1&pricing_id=5&configoptions[20]=yes&configoptions[7]=default%20optionNote: Be sure your option values are properly URL encoded!Wizard BoxesWizard SliderWizard ListStandard/order/config/index/label/?group_id=1&pricing_id=5Configurable Options may be set in version 2.21.0+ of the Order pluginSpecific configurable options can be set by specifying each option in the URI using the option ID and the option value in the format “configoptions[OPTIONID]=VALUE”, e.g.:/order/config/index/label/?group_id=1&pricing_id=5&configoptions[20]=yes&configoptions[7]=default%20optionNote: Be sure your option values are properly URL encoded! |
Domain and Other
Note! When using the “Domain and Other” order type, you should link to the domain search page and include your parameters. e.g. /order/config/preconfig/label/(parameters, like ?group_id=5&pricing_id=5)
As of version 2.4.0 of the Order plugin, a coupon can be set in the URL to an order form, and will be applied automatically as the user continues through the order process. The coupon may be set automatically when added to a URL at /order/main/, or /order/config/ (in v2.6.0), using the parameter coupon. Consider a couple examples:
When including a coupon code in a URL, the coupon code must be URL encoded.
| Description | Parameters | URI | Notes |
|---|---|---|---|
| Set a Coupon to an Order Form | coupon The coupon code to apply to the order | /order/main/index/label/?coupon=CPN123 | In this example, the Coupon code is CPN123Order form label is label |
| Set a Coupon to a Specific Product | group_id The ID of the package group to displaypackage_id The ID of the package to select by defaultNote that this is the ID of the package as seen in the URL when editing the package.coupon The coupon code to apply to the product | /order/main/index/vps/?group_id=1&package_id=5&coupon=10off | In this example, theCoupon code is 10offOrder form label is vpsPackage Group ID is 1Package ID is 5 |
| Set a Coupon to a Specific Product Configuration | group_id The ID of the package group to display.pricing_id The ID of the package pricing.The pricing_id is the ID of a particular price point as defined under the package.coupon The coupon code to apply to the orderconfigoptions A list of option IDs and their values (since plugin v2.21.0+) | Order TemplateURIAJAX BoxesAJAX SliderAJAX List/order/main/packages/label/?group_id=1&pricing_id=15&coupon=10off&configoptions[20]=yes&configoptions[7]=default%20optionNote: Be sure your option values are properly URL encoded!Wizard BoxesWizard SliderWizard ListStandard/order/config/index/label/?group_id=1&pricing_id=15&coupon=10off&configoptions[20]=yes&configoptions[7]=default%20optionNote: Be sure your option values are properly URL encoded! | In this example, theCoupon code is 10offOrder form label is labelPackage Group ID is 1Package Pricing ID is 15Package Configurable Options are:Option IDOption Value20yes7default option |
If the order form supports more that 1 currency, the currency can be specified in the URL. Consider a couple examples:
| Description | Parameters | URI | Notes |
|---|---|---|---|
| Set the currency for the order form. | currency The currency to use for the order | /order/main/index/label/?currency=USD | In this example, the Currency is USD |
| Set the currency to a Specific Product | group_id The ID of the package group to displaypackage_id The ID of the package to select by defaultNote that this is the ID of the package as seen in the URL when editing the package.currency The currency to use for the product | /order/main/index/vps/?group_id=1&package_id=5¤cy=USD | In this example, theCurrency is USDOrder form label is vpsPackage Group ID is 1Package ID is 5 |
If Blesta is configured to support more than one language, the language can be specified in the URL. Consider a couple examples:
| Description | Parameters | URI | Notes |
|---|---|---|---|
| Set the language for the order form. | lang The language code to use for the order | /order/main/index/label/?lang=fr_fr | In this example, the Language is fr_fr |
As of Blesta 4.11, the Order Manager includes an Affiliate System. To activate the Affiliate System, visit Clients > Affiliates and click the “Enable Affiliate System” button to activate.

Once the Affiliate System is active, you will be taken to the General Settings. It’s important to set these details now. When a client signs up to become an affiliate, their settings will initially mirror these settings, but can be overridden on an individual basis as desired.
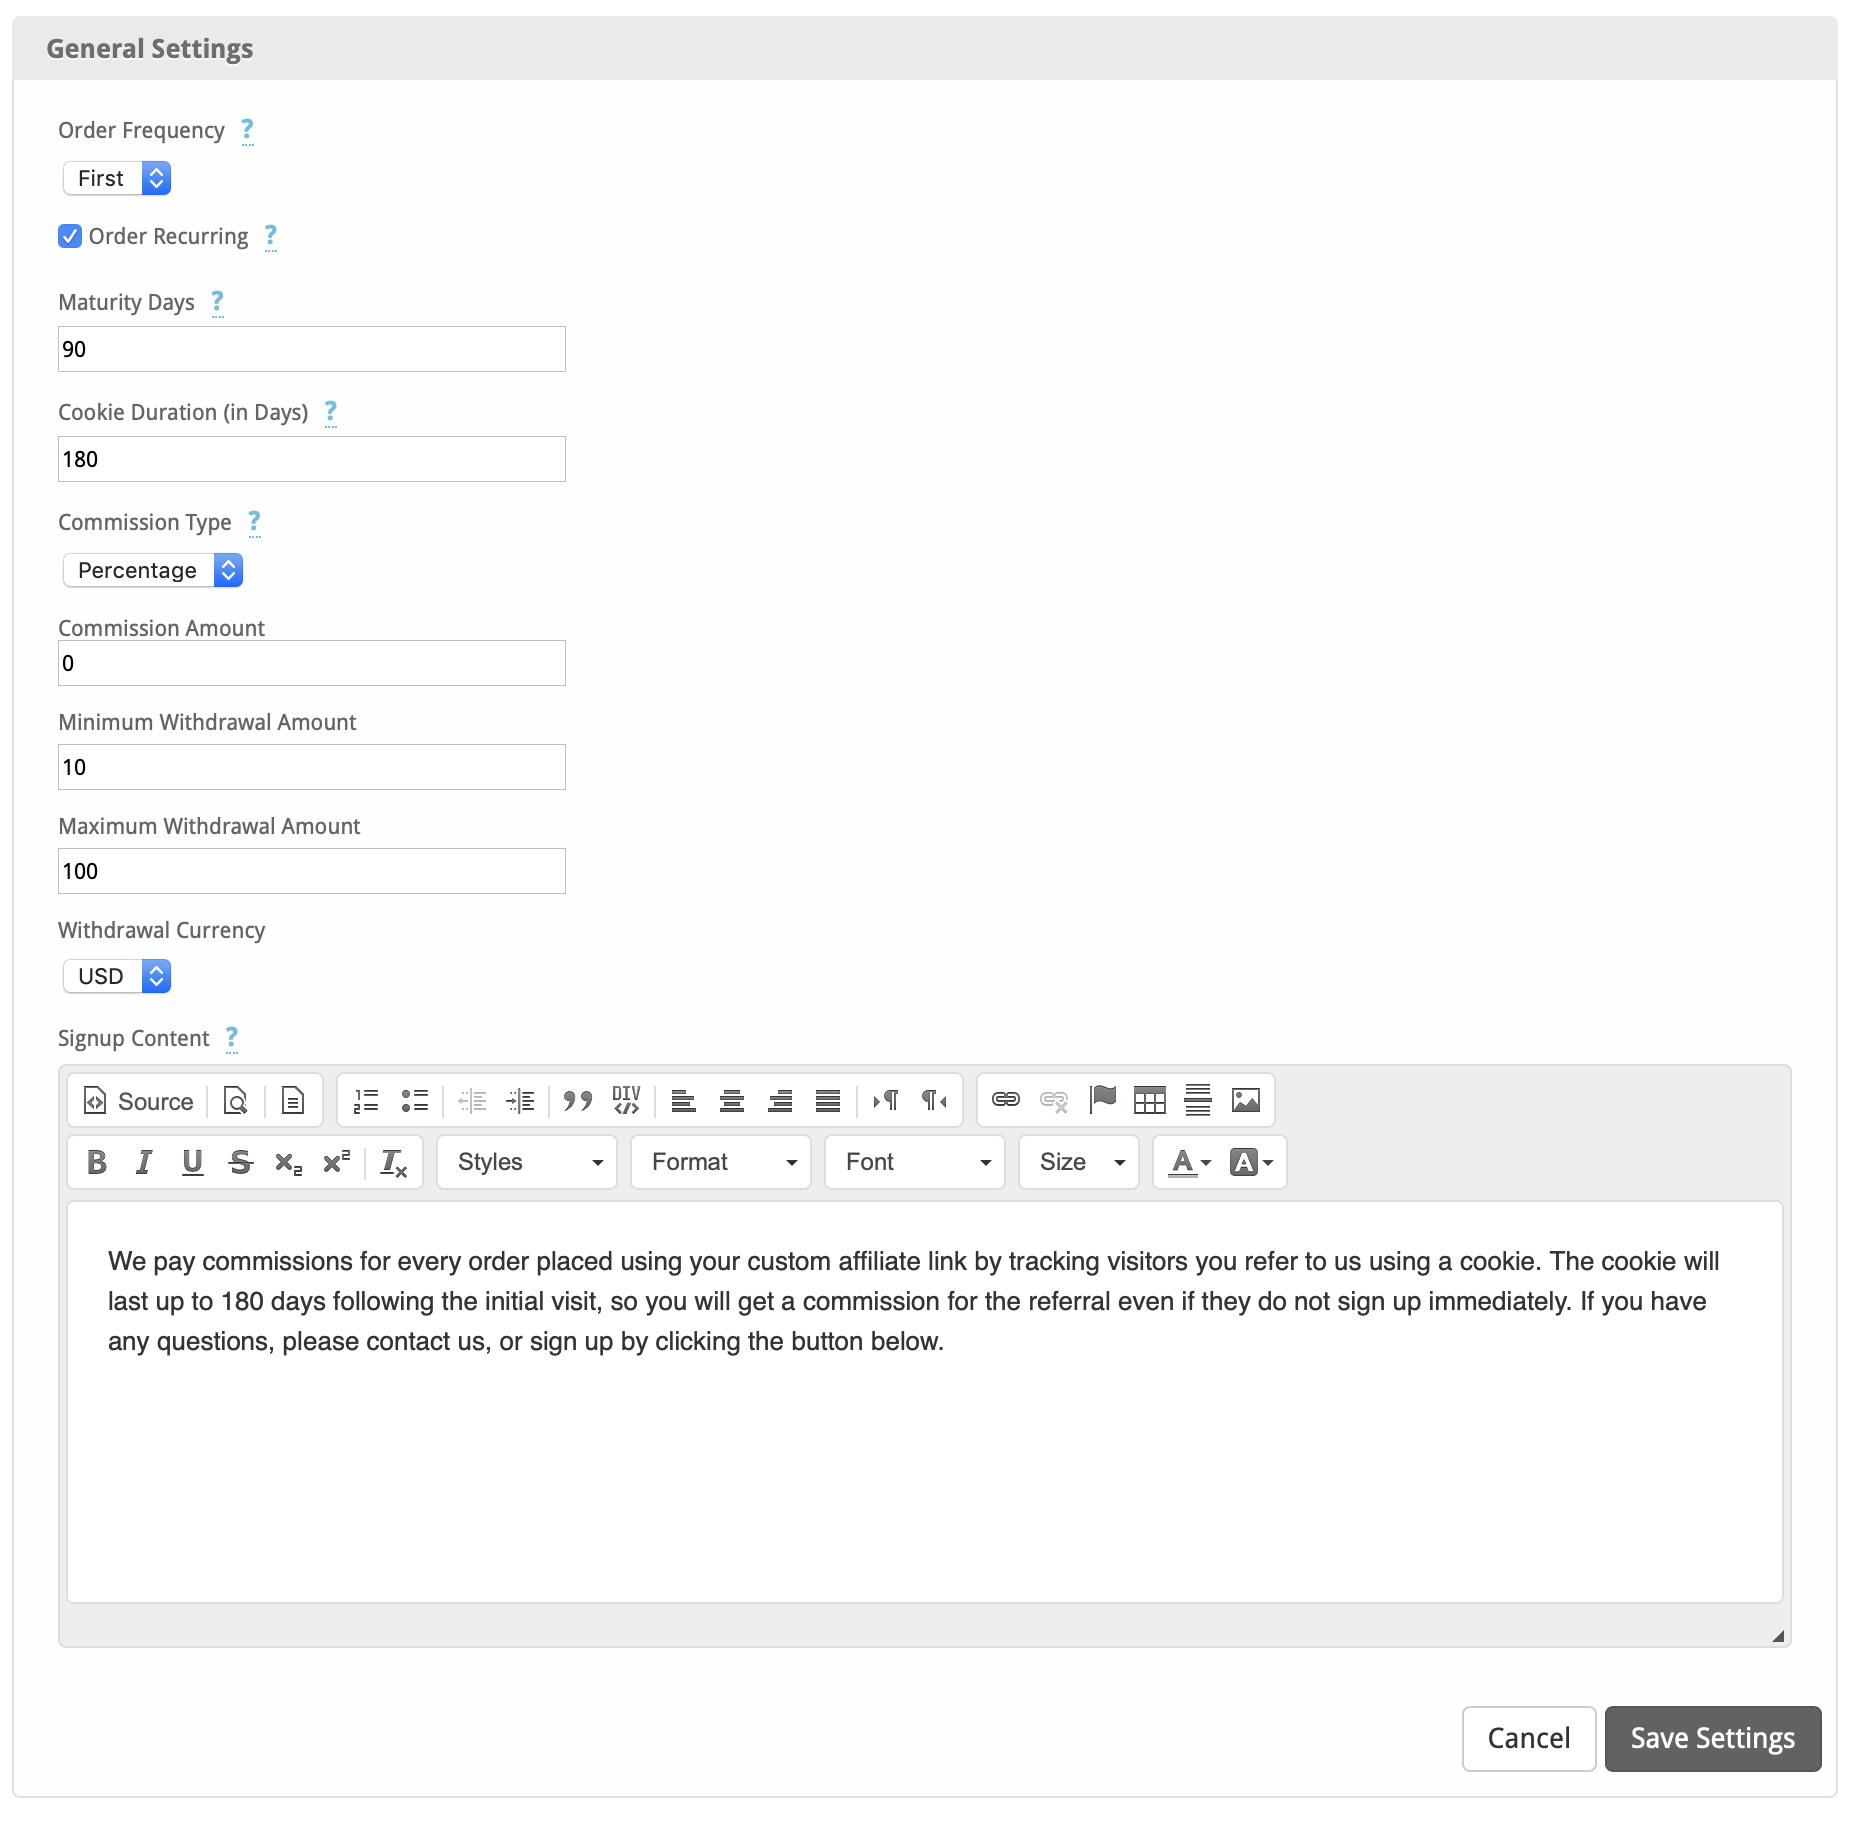
| Setting | Default Value | Description |
|---|---|---|
| Order Frequency | First | (First, Any) First to pay referrals only for the first order a client makes using a referral link, or Any to pay referrals for each order a client makes using a referral link. |
| Order Recurring | (checked) | WarningIf this option is unchecked and later becomes checked, any referrals that were made previously will start to count as a recurring referral when subsequent invoices are generated.Whether referrals will be paid for services ordered that renew. Uncheck to apply to the initial purchase only. |
| Maturity Days | 90 | The number of days after payment a referral matures and becomes available for payout. |
| Cookie Duration (in days) | 180 | The days that an affiliate cookie remains valid after a referral link is followed. |
| Commission Type | Percentage | (Fixed, Percentage) The calculation method used to determine referral commission. Either a fixed value per order or a percentage of the order total. |
| Minimum Withdrawal Amount | 10 | The minimum amount, in the Withdrawal Currency, that can be withdrawn at a time. |
| Maximum Withdrawal Amount | 100 | The maximum amount, in the Withdrawal Currency, that can be withdrawn at a time. |
| Withdrawal Currency | USD | The currency that commissions can be withdrawn in. |
| Signup Content | The content that an client will see when they visit the Affiliates page before signing up. |
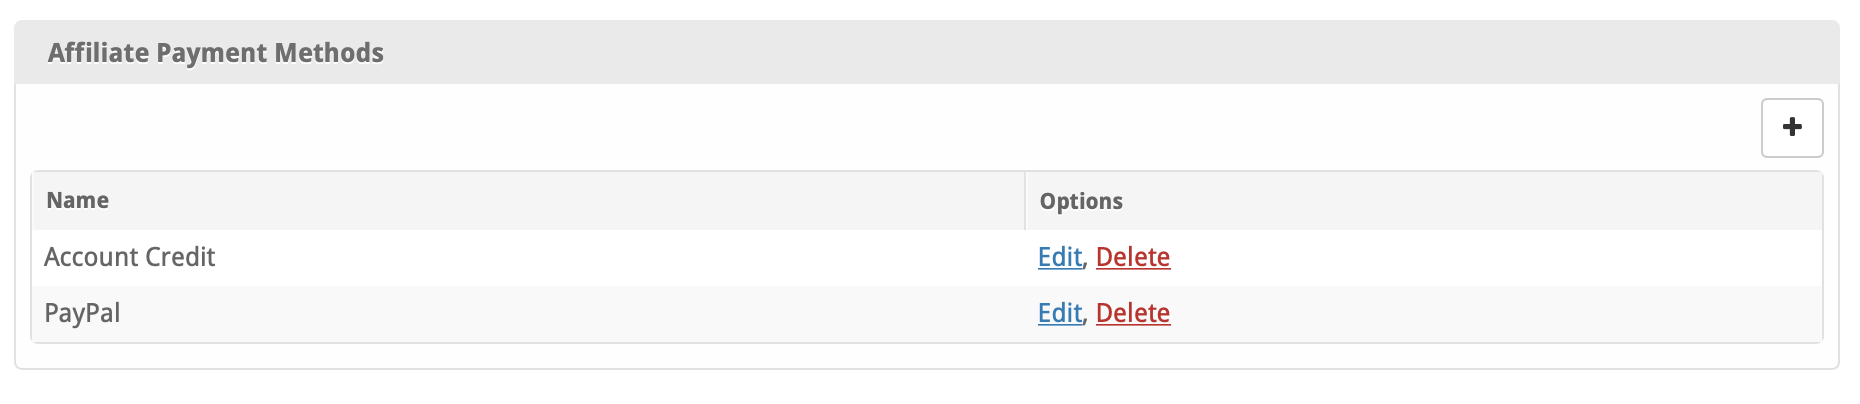
You can add payout payment methods under Clients > Affiliates > Settings > Payment Methods.
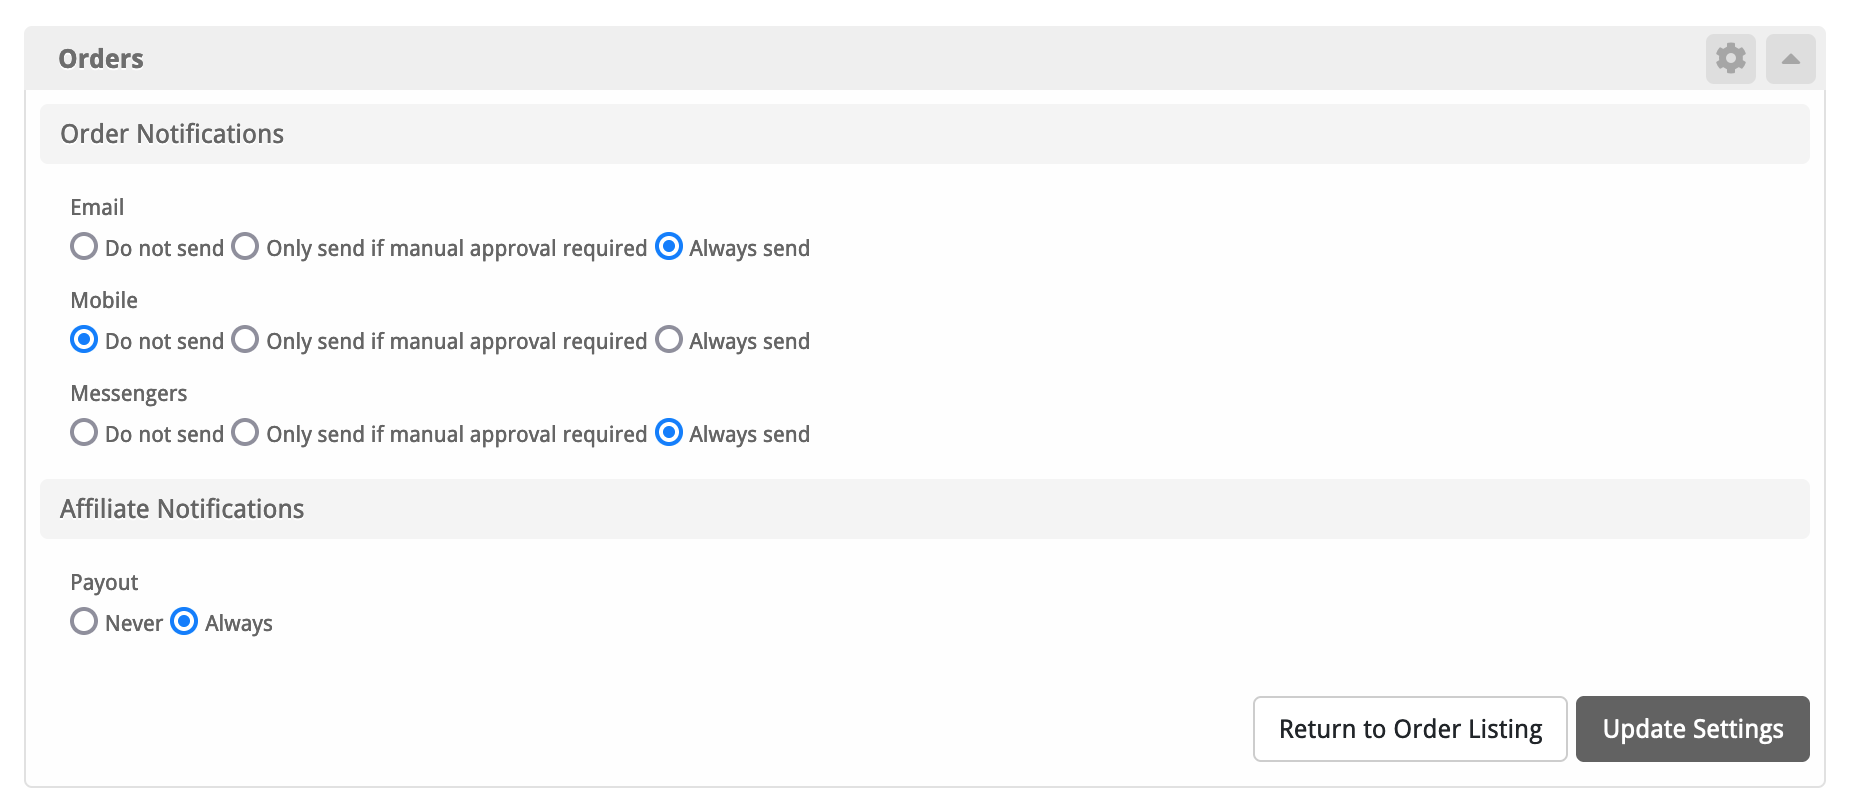
When an affiliate makes a payout request, it can be viewed under Clients > Affiliates > Payouts. Staff can receive an email when an affiliate submits a payout request by subscribing to these notices within the Cog/Gear icon in the Orders widget, which can be found either under Billing > Overview, or the Dashboard.

A listing of all affiliates can be found under Clients > Affiliates > Affiliates.

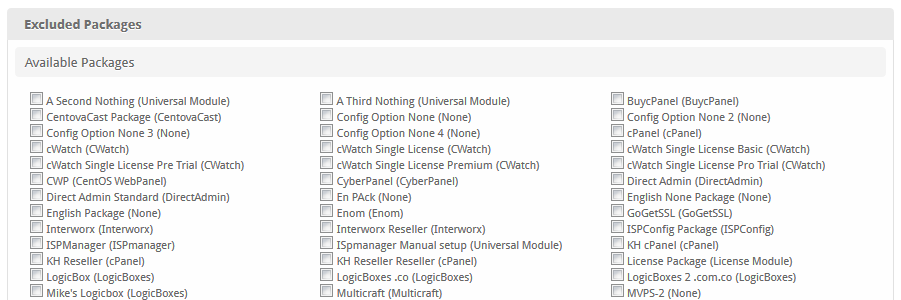
A list of packages to be excluded from payout calculations can be found under Clients > Affiliates >Settings > Excluded Packages. Check the box for a package to exclude it.
Clients can sign up to be affiliates by clicking the “Affiliates” link in the client area. The client will see the “Signup Content” as defined above when they visit this page, and will be able to sign up as an affiliate.
Click here to see client affiliate screenshots…
Staff can override the affiliates settings by clicking the “Manage Affiliate” link on the client’s profile under Actions, as well as see graph statistics.
Click here to see client profile manage affiliate screenshots…
Sometimes it’s necessary to manually adjust an affiliates funds available for payout. This can be done by editing the database manually (backup first!) and updating the order_affiliate_settings.total_available where order_affiliate_settings.affiliate_id = the affiliate’s ID. The affiliate’s ID can be found by managing the affiliate, and observing the ID in the URL. a URL ending in “/admin/plugin/order/admin_main/affiliates/1” would indicate an affiliate ID of 1.
To enable messengers for the Order System, you need to go to Billing, then click the cog/gear on the orders widget. If it’s not disabled go to Manage widgets and then drag the Order System plugin to the left. If it’s not shown up go to Settings > Company > Plugins > Order System: Install. It should be installed by default on the first company.
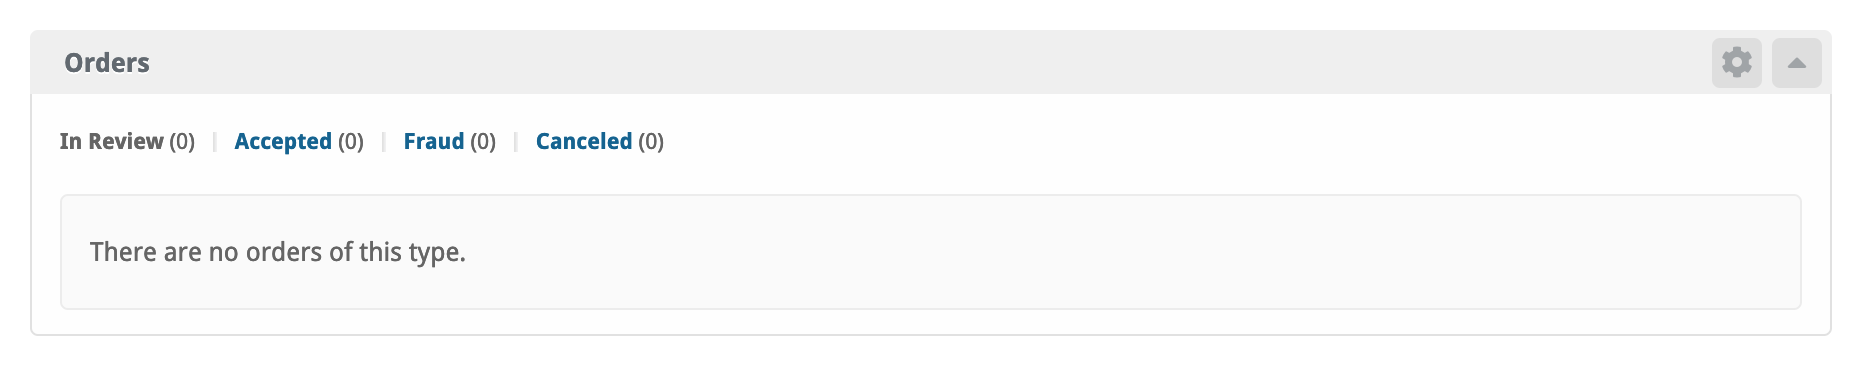
You’ll be able to enable the messenger by clicking: Always send or Only send if manual approval required.